Showing posts with label yum. Show all posts

Friday, July 31, 2020

Gluten-Free Jamaican Patties!


Hello! It's been what...two years since I've last posted on here? A lot has happened since I've last posted on here but I'll save that for another post. Today let's focus on a recipe! I have been making these Jamaican inspired patties whenever we get ground beef from our meat subscription. They're packed with flavor,  and because I'm kind of a weenie with super spicy things they're just the right amount of spiciness for me. However, if you dare you can swap the jalapenos for habaneros or if you can get a hold of them try scotch bonnet peppers which are more traditional in Jamaican cuisine. 


Jamaican patties hold a special place in my heart and belly. When I was a little girl living in Queens, there was a pizza shop around the corner that sold Jamaican patties and I would always order that over a slice of pizza. This is saying a lot for a girl who cannot resist a New York/New Jersey slice! The recipe for my Jamaican patties are not only delicious, they are gluten and dairy-free making them the perfect option for those with allergies or intolerant. The dough recipe is adapted from this paleo empanada recipe. The coconut flavor from the dough pairs rather beautifully with the curried beef. I hope you guys enjoy them as much as we do!


Gluten-Free Jamaican Patties

Makes 12 patties


Gluten-free dough:

·        1 cup almond flour

·        1 cup tapioca starch

·        ½ teaspoon sea salt

·        1-13.5 can full-fat coconut milk

Beef Filling:

·        2 tablespoons olive or avocado oil

·        1 small red onion, small dice

·        2 jalapenos, minced

·        3 garlic cloves, minced

·        1 ½ lbs. ground beef

·        Salt and pepper to taste

·        1 ½ tablespoon tamari

·        2 teaspoons curry powder

·        1 teaspoon garlic powder

·        1/8-1/4 teaspoon cayenne pepper

·        2 teaspoons smoked paprika

·        ¼ cup bone broth or stock

·        ¼ cup gluten-free flour

·        1 egg beaten


Instructions:

For the patty dough:

1.   Preheat oven to 375 degrees Fahrenheit. In a large bowl, mix almond flour, tapioca starch, sea salt, curry powder and coconut milk. Consistency should be thick and silky.

2.   Heat a cast-iron skillet over medium-high heat. Once heated, place a quarter cup of the batter into the pan. Allow it to cook until bottom of the disc is firm enough to move.

3.   Using a spatula, flip over and cook a few seconds longer. Remove from pan and set onto wire rack. Repeat with the rest of the discs. There should be 12 discs in total.


For the beef filling:

1.   In a large skillet over medium heat, add the oil. Sauté the onions and jalapenos until softened about 3 minutes. Add in the garlic and cook until garlic is fragrant. Increase temperature to medium-high heat. Add the ground beef, season with salt and pepper. Season with tamari and al the seasonings. Using a wooden spoon, chop up the beef finely as it cooks. Once meat is cooked through, drain some of the liquid from the meat, leaving a couple tablespoons of fat in the skillet. Return the skillet onto the stove and add in the broth, allowing it come to a simmer. Add in gluten free flour and mix to incorporate. Beef should be nice and moist at this point, turn off heat and allow the beef filling to cool about 30 minutes.

2.   Add about a ¼ cup of beef filling to center of the patty disc, leaving enough room free around the edges. Fold over and pinch the disc into a half-moon. Repeat until you are finished with all the patties. Add patties onto a baking sheet with a reusable silicone baking mat or parchment paper, flatten them slightly and brush each patty with beaten egg and bake for 25-30 minutes or until the crusts are nice and golden. 


Friday, June 17, 2016

What's in our first CSA bag:


This Wednesday we picked up our first CSA of the year! CSA stands for community supported agriculture, farmers share their freshly picked crops with the community, and it's a great opportunity to promote local farmers; a win-win if you ask me! It's our third year subscribing to Brenckles and this year we are picking up the produce once a week from their greenhouse in our town. We absolutely love it because we know where our produce is coming from, eating more seasonally and often get vegetables we can't find at the grocery store! 

Here's what we got in our first bag and here are what I plan on doing with each item:
  • Garlic scapes - One of the least common items in our bag! They are those long green thingies on the left hand side of the photo and are the flower bud of the garlic plant. We usually receive them the first couple of weeks, and I remember the first time I saw them I had no idea what to do with them! Fortunately for Google, I learned that they make an excellent base for pesto and can also be used in place of garlic (though they're more mild in taste.) I am thinking of using this batch in chicken stock over the weekend and if I have any leftover maybe I'll chop some up to put into guacamole for Father's Day!
  • Kale - Anyone who knows me knows I love kale. I'm a big fan of raw kale salads especially massaged kale. I am really intrigued by this Kale Guacamole recipe. I usually keep things simple with my guacamole but adding kale into the scene is worth trying!
  • Spinach - I already made chopped spinach salad with strawberries, fresh shallot balsamic vinaigrette and poppy seeds back to back, and also added some to my smoothie this morning! I love the spinach our CSA gives us. It's so much sweeter and fresher than the stuff I find at the grocery store. My favorite ways to use it is in smoothies because it's one of the more neutral greens, raw in a salad, and it also tastes fabulous sauteed with a little olive oil, salt and pepper.
  • Strawberries - I am obsessed with these strawberries! They're perfectly sweet and ripe. So far Lydia and I have been eating them as is, in the aforementioned spinach salad, and sliced up for overnight oats. 
  • Local honey - I'm a big fan of baking with honey and will probably use it in some future desserts, drizzled in plain yogurt, sometimes on waffles, or in a timeless peanut butter, banana and honey sandwich. Mmmm!
  • Mild salsa from the farm's veggies - The salsa is made from the farm's tomatoes, onions, garlic and peppers. It is a simple little salsa but definitely not lacking in the flavor department! Chips and salsa here we come... 
I'm looking forward to the upcoming months and using these vegetables to make delicious meals. I hope you all have a beautiful weekend and Father's Day :)


Wednesday, June 8, 2016

Overnight Oat Espresso Smoothie


I was around 18 years old when I became more serious about eating healthier, and it made me realize how eating a good breakfast affected my mood in the morning. Truth be told, I wasn't always a morning person and now breakfast is one of my favorite meal's of the day! In my opinion a good breakfast needs healthy fat, protein, and most of the time whole grains. Oh and there must be coffee present! Keeping all of that in mind this overnight oat espresso smoothie is an A+ in my book. 

Much like any overnight oat recipe, most of the work goes on while you're sleeping; the oats and chia seeds soak in the milk promising a beautiful pudding-y texture in the morning. I prefer using frozen bananas in smoothies because it gives them an indulgent, frosty and creamy mouth-feel. In this particular smoothie, I feel like I'm indulging in a fancy frappe but in reality it's a nutritious smoothie we all can enjoy at home! To brew the shot of espresso, I used my Nespresso and my favorite flavors are Altissio & Diavolitto because they really pack on a punch!

Here's all you need to do:


overnight oat espresso smoothie
serves 1

  • 1/4 cup old fashioned oats 
  • 1 tablespoon chia seeds
  • 1 cup milk of choice 
  • A shot of espresso or 1/2 cup of strong brewed coffee
  • 1 frozen sliced banana
  • 1-2 medjool dates, pitted
  • 1/2 teaspoon ground cinnamon
  • 1/4 teaspoon almond extract
  • optional: 1 tablespoon smooth almond or peanut butter
Combine oats, chia seeds and milk in a small bowl. Seal with plastic wrap and refrigerate overnight. The next day brew the espresso and set aside. Place frozen banana, dates, cinnamon, almond extract and nut butter in blender. Pour espresso with the rest of the ingredients and blend until smooth and creamy. If you prefer a cooler smoothie add in some ice. Serve immediately. 


Friday, January 23, 2015

Recipe Redo: Chocolate Dipped Coco's


Guys this is the third time I’m revisiting this recipe and making more changes; I can’t make promises but I think this will be the last time I’ll have to do so. I gotta admit I’m finding these to be pretty darn tasty! The first time I made these cookies was three years ago and while they tasted good, they were also packed with way too much sugar for my liking and the dough was sticky and difficult to work with; if that wasn't bad enough the additional step of dipping the bottom of the cookie in chocolate made quite a mess. Then two years ago, I tried making adjustments and replaced the brown sugar for maple syrup, turbinado sugar and added a touch of molasses; again, good but not 100% there for me.


Somehow I forgot all about the cookies until my mom recently told me she loved them! Funny how people manage to remember and enjoy my least favorite recipes… For the sake of my mommy, I revisited the recipe and ended up with a delicious little coconut cookie dipped in melted chocolate; I was a fan! I brought them to my mom and sister as a late Christmas present and they were fans too. Just for kicks, this time around I decided to add the addition of crushed almonds after dipping the cookies in chocolate for an elegant touch. If you like coconut, chocolate and almonds (think: Almond Joys) then you’ll dig these!


Chocolate Dipped Coco’s

makes 21 bite size cookies

Ingredients:

1 ½ cup shredded unsweetened coconut
1/3 cup organic shortening or unsalted butter
½ cup brown sugar
¼ cup cane sugar
1/3 cup almond milk
1 ½ teaspoon vanilla extract
½ teaspoon almond extract
1 ½ cup all-purpose flour
1 tablespoon ground flax seeds (optional)
¼ teaspoon baking soda
½ teaspoon sea salt
½ cup slithered almonds or chopped raw almonds
1 heaping dark chocolate or semi-sweet chips, plus 2 tablespoons coconut oil

Directions:
In a large skillet, pour the coconut and toast over medium heat for about five minutes, or until the coconut is golden brown. Stir occasionally and be careful not to burn it. Once the coconut is toasted, remove from heat and let cool. In a stand mixer fitted with paddle attachment or large bowl with electric mixer, cream together coconut oil, vegan butter or butter and both sugars on medium-high speed until fluffy. Mix in almond milk, vanilla and almond extract until well combined. Add in flour, ground flax, baking soda and salt and beat on low-speed until just combined. Scrape down the sides of the bowl with a spatula if necessary, and fold in shredded coconut. Refrigerate dough in saran wrap for at least 2 hours or overnight. (This will make the dough easier to work with and prevent the dough from being too thin and delicate.) Preheat oven 350, line a baking sheet with parchment paper or a silicone mat. Using a tablespoon or your hands form dough balls, flatten them slightly and transfer onto baking sheet. Bake about 10 minutes, or until edges are golden brown. Allow cookies to cool 2 minutes before transferring onto cooling rack.

Chocolate Dip 2 ways:

1. By creating a makeshift double boiler or using a real double boiler. Simply melt the chocolate chips and coconut oil in a small saucepan underneath a bigger saucepan with simmering water.

2. Melt the chocolate chips and coconut oil by placing them in a microwave safe bowl for thirty second intervals until completely melted.

After melting the chocolate glaze, allow it to thicken and cool for at least five minutes. Dip half the cookie in the chocolate glaze then coat the chocolate side with the almonds. Repeat with all the cookies. Transfer cookies onto parchment paper and allow the chocolate to set before serving. Cookies can be stored in an airtight container about 5 days. 

xo, Jessica

Wednesday, September 10, 2014

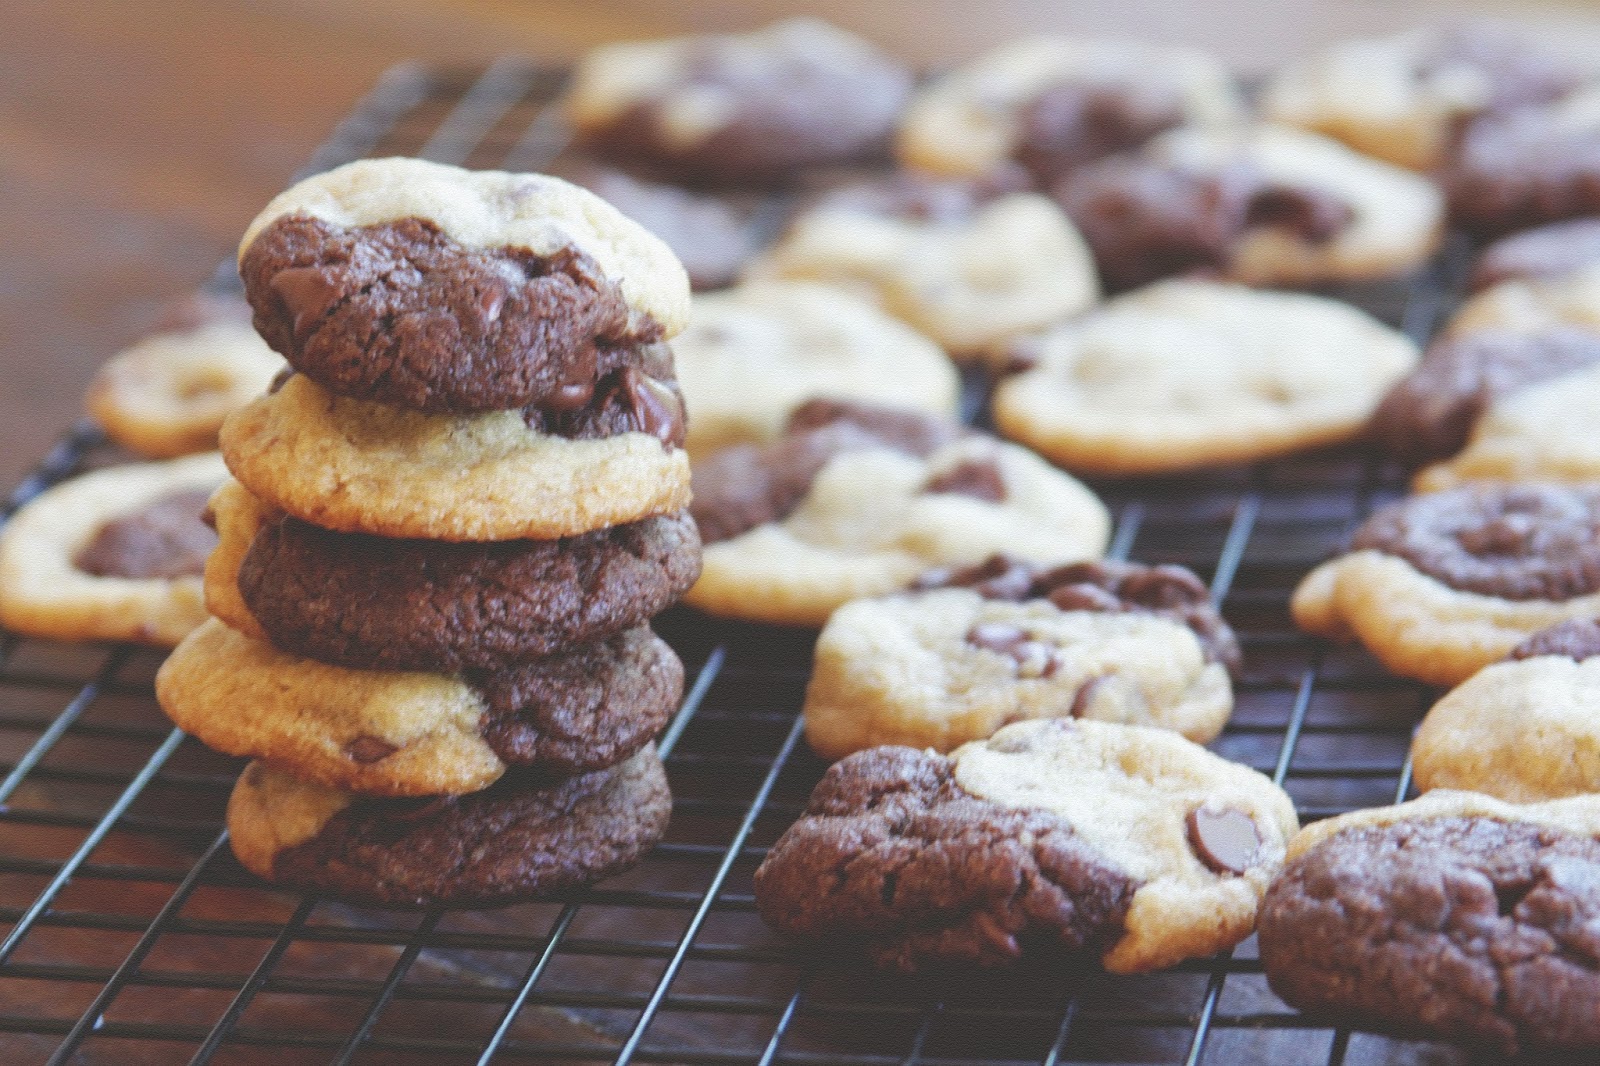
Chocolate Chip Marble Cookies {dairy-free and egg-free!}


Hey guys,

I have a sensational chocolate chip marble cookie recipe for all to indulge in today. From my understanding everyone has a favorite style of chocolate chip cookies and mine happens to be more crispy on the outside, but still tender in the inside and perfectly balanced between sweet and salty. How do you take your chocolate chip cookies?


In my humble opinion marrying double chocolate chip cookies with classic chocolate chip cookies is decadent without being too rich. Don't get me wrong, I do love my chocolate on chocolate but baking these cookies gives me the option of eating both flavors in one shot! ;) They also look pretty radical, am I right?

Chocolate Chip Marble Cookies {egg-free and can be made dairy-free}
makes 2 dozen or 30 for bite size cookies
inspired by Top with Cinnamon and recipe adapted from The Joy of Vegan Baking

4 ½ teaspoons Ener-g Egg Replacer
6 tablespoons water
1 cup solidified coconut oil or softened butter
¾ cup natural cane sugar
¾ cup firmly packed light brown sugar
½ teaspoon blackstrap molasses
2 teaspoons vanilla extract
2 ¼ cups unbleached all-purpose flour
1 teaspoon baking soda
1 teaspoon sea salt
2 cups dairy-free chocolate chips
¼ cup unsweetened cocoa powder

Preheat oven to 375 degrees. Line cookie sheet with parchment paper.

In a food processor or blender, whip the egg replacer and water together, until it's thick and creamy. Blending it in a food processor or blender results in a better consistency than what you could get if you did it by hand.

In a large bowl, cream the butter, granulated sugar, brown sugar, and vanilla. (I always use my stand mixer on medium-high speed because I'm lazy and it comes out much fluffier.) Add the egg replacer mixture, and thoroughly combine. In a separate bowl, combine the flour, baking soda, and salt. Gradually beat the flour mixture into the wet mixture until it begins to form a dough. When it is almost thoroughly combined, separate half of the batter into a medium sized bowl. Add unsweetened cocoa powder to the separate half of batter and mix until combined. Fold in 1 cup of chocolate chip to each batter.

On a clean surface scoop up a spoonful of each dough and roll into balls. Sandwich the classic chocolate chip cookie ball with the double chocolate chip cookie ball, and roll together slightly to combine flavors. Drop marble cookie balls onto cookie sheets and press down slightly. Bake 8-12 minutes. After a couple minutes transfer to wire racks to cool completely. 


Go ahead and enjoy these cookies with a loved one, 
Jessica

Thursday, November 1, 2012

Making Cookies a Little Healthier (an experiment gone right!)

Hey guys!
Every now and then I love to go back to my old recipes and revise them a little bit. About a month ago at Natural Gourmet we had a class dedicated to converting different ingredients in very traditional cookie and cake recipes. I particularly found this class to be fun, informative and fast-paced! A classmate and I made chocolate chip cookies, first starting with commercial ingredients such as: brown & white sugar, butter, eggs, semi-sweet chocolate chips and refined flours.
Throughout the day we replaced one ingredient at a time and each time we noticed a change in the texture, taste and shape of the cookies. One lesson I learned is the important role sugar makes in a cookie and that is: spreading. We thought it would be a good idea  to cut back on sugar and add more chocolate chips... But when the cookies were removed from the oven they looked unbaked and had not spread at all!  By the end of the class we had a delicious cookie that was completely vegan, 50% whole grain and free of refined sugar.

                                       ^ the original cookies with brown sugar
Now let’s get back to my revised coconut and chocolate cookies. The original recipe used refined sugar, and I thought it would be fun to make a healthier but still delicious coconut and chocolate cookie. When I first made these cookies I noticed they spread like crazy and appeared flat so, I revisited my memory from the converting class and cut back on the sugar. I also added oats for some texture, black strap molasses for color and removed the flax meal simply because I didn’t have any. As for someone who loves coconut, oats and dark chocolate these cookies make me smile a lot!
   
Ingredients:
1 ½ unsweetened shredded coconut
1 cup unbleached all-purpose flour
½ cup rolled oats
½ teaspoon sea salt
1 teaspoon baking soda
1/3 cup solidified coconut oil
½ cup turbinado sugar
1/3 cup maple syrup
1 tablespoon blackstrap molasses
1/3 cup unsweetened almond milk
1 teaspoon almond or vanilla extract (the almond will make the cookie taste like an almond joy candy, if that’s what you’re going for!)
1-1/2 cup dark chocolate chips + 1 tablespoon coconut oil
Whole almonds or pecans
Procedure:
Preheat oven to 350 degrees. In a large skillet pour coconut and toast over medium-low heat for about five minutes, or until the coconut turns golden brown. Try not to burn the coconut! Once coconut is toasted remove from heat and cool.
Meanwhile, in a large bowl sift together dry ingredients (except coconut, chocolate chips and almonds) and in separate bowl combine coconut oil, sugar, maple syrup, molasses, almond milk and extract, blend until smooth. Add dry ingredients to wet and stir until the batter is thick, fold in the cooled coconut. Using a melon baller or spoon drop the dough on a baking sheet lined with parchment paper. (Make sure the unbaked cookies are about three inches apart to avoid an overlap!) Press an almond in the center of each cookie and bake eight minutes, just until the edges are golden brown. Allow the cookies to set on the baking sheet a few minutes before transferring them to cooling rack.
The Chocolate Glaze: Place the chocolate chips and coconut oil in a small saucepan over medium-heat. Stir until chocolate has completely melted, turn off heat and allow chocolate glaze to set five minutes. Once the cookies are completely cooled drizzle each cookie with chocolate, and if there’s extra chocolate dip the bottom of the cookie in the chocolate and place on a baking sheet lined with parchment paper. Allow chocolate to harden before serving. To speed up the process you can place the cookies in the freezer for fifteen minutes!
I hope you all enjoy these cookies as much as I do, and you’ll stay tuned for more of my revamped and improved recipes!
Have you ever changed up one of your go to recipes out of curiosity?
-Jessica